1
/
of
3
The Frugal Fixer
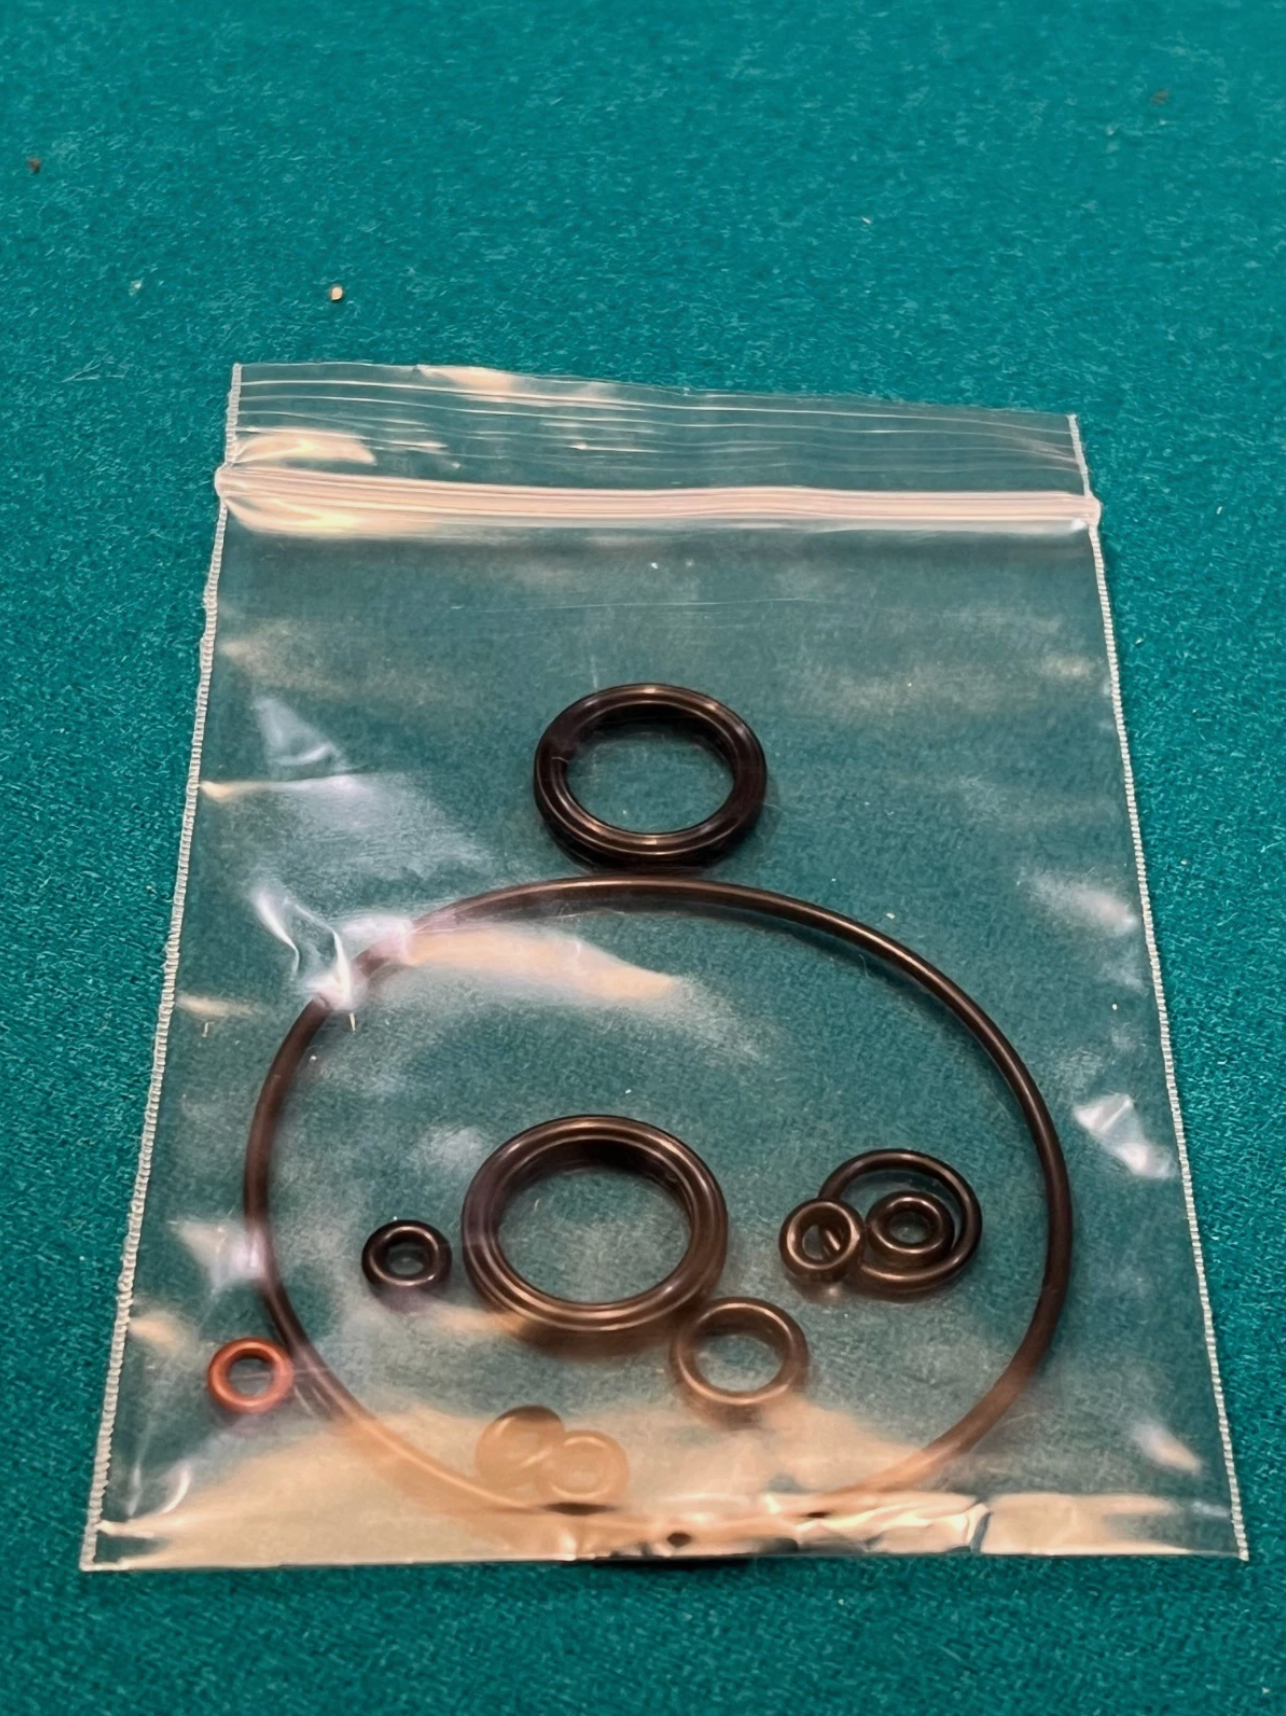
Improved O-rings For Scotts Steering Stabilizer Damper Rebuild Repair Kit
Improved O-rings For Scotts Steering Stabilizer Damper Rebuild Repair Kit
Regular price
$23.99 USD
Regular price
Sale price
$23.99 USD
Quantity
Couldn't load pickup availability
Tools and Materials Needed
- Damper Oil: Bel-Ray HVI Light, Spectro Very Light, PJ1 2.5wt, or equivalent (3wt hydraulic oil, ~100ml). Do not use motor oil.
- Tools: Metric Allen wrenches (for 4x10 and 4x12 socket screws), torque wrench, flathead screwdriver, syringe or tapered-tip oil bottle (Scotts-specific recommended), pliers, clean rags, contact cleaner or brake cleaner, air compressor (optional for drying).
- Other: Drain pan, gloves, safety glasses, Scotts service manual (downloadable from scottsonline.com).
- Optional: Scotts link arm removal tool and seal replacement tool for easier servicing.
Step-by-Step Rebuild Instructions
- Safety Precautions
- Park the vehicle or motorcycle on a flat surface, engage the parking brake, and disconnect the battery to prevent electrical issues.
- Work in a clean, well-lit area to avoid losing small parts or introducing debris.
- Wear gloves and safety glasses to protect against oil and sharp components.
- Remove the Stabilizer
- Detach the stabilizer from the vehicle. For motorcycles, remove the link arm and tower pin using appropriate tools (e.g., 6x20 socket cap screws).
- Clean the exterior with contact cleaner to prevent dirt from entering during disassembly.
- Disassemble the Stabilizer
- Remove Top Cover: Using a metric Allen wrench, remove the ten bolts from the top housing cover. Twist the cover sideways to detach. Place a drain pan underneath to catch oil.
- Drain Old Oil: Remove the top cap O-ring and dump the old oil into the drain pan. The oil may appear dirty due to metal wear or breakdown.
- Remove Internal Components:
- Carefully extract the main wing assembly and main seals.
- Remove the base valve assembly and its O-ring.
- Unscrew the sweep control assemblies and their O-rings.
- Remove the high-speed valve assembly and its O-ring.
- Remove the bottom bleed hole screws (4x6 socket flathead) and O-rings.
- If servicing the knob, remove the set screw, spring , steel ball , and brass knob O-ring.
- Caution: Handle internal components carefully to avoid damaging the main wing or valve assemblies. If parts like the shear pin or main housing are worn, they may need replacement (additional cost).
- Clean Components
- Clean all parts with contact cleaner or brake cleaner to remove old oil and debris. Focus on the O-ring grooves, main wing, and valve assemblies.
- If available, use an air compressor to blow-dry components to ensure no residue remains.
- Inspect the main seals, shear pin, and wing assembly for wear or damage. Replace if necessary.
- Replace O-Rings and Seals
- Install new O-rings from the rebuild kit:
- Top cap-to-body O-ring (#0338-55): Lubricate lightly with damper oil and seat in the top cover groove.
- Main seals (#1027-02, x2): Place in the main wing assembly, ensuring proper alignment.
- Base valve needle O-ring (#0338-14): Install on the base valve (#4003-01 or #4003-02).
- Sweep control O-ring (#0338-58 or #0338-58-SD): Fit onto each sweep control assembly.
- High-speed valve O-ring (#0338-59): Install on the high-speed valve (#4005-01 or #4005-02).
- Bottom bleed hole O-rings (#0338-56, x2): Place in the bleed hole recesses.
- Knob-to-base valve O-ring (#0338-57): Install if servicing the brass knob (#4016-01).
- Use a small amount of damper oil to lubricate O-rings for easier installation and to prevent twisting. Ensure all O-rings seat properly without pinching.
- Reassemble the Stabilizer
- Reinstall the main wing assembly, base valve, sweep controls, and high-speed valve into the main housing (#4002-01 or SD-specific).
- Partially fill the housing with damper oil (Bel-Ray HVI Light or equivalent) before reattaching the top cover to simplify bleeding.
- Grease the top cap O-ring and carefully press the top cover onto the housing, ensuring the seal remains seated. Tighten the ten bolts (4x12 and 4x10) to Scotts’ torque specs (consult service manual, typically 2-3 Nm).
- Reinstall the bottom bleed hole screws with their O-rings.
- Fill and Bleed the Stabilizer
- Flip the stabilizer over to access the bottom bleed holes.
- Remove one bleed screw (#0382-05) and move the main wing fully to one side using the link arm.
- Using a syringe or Scotts tapered-tip oil bottle, inject damper oil into the opposite bleed hole to push out air. Fill until oil flows consistently without bubbles.
- Reinstall the bleed screw, then move the wing back and forth slowly to check for trapped air. Repeat the process if air remains, removing one screw at a time and injecting more oil.
- Leave a small air bubble to allow for oil expansion during heating, as recommended by Scotts.
- Tighten both bleed screws securely.
- Test the Stabilizer
- Manually move the wing back and forth to ensure smooth damping with consistent resistance. If it feels sloppy or has no resistance, re-bleed the system.
- Reinstall the stabilizer on the vehicle, reconnecting the link arm and tower pin. Tighten all bolts to manufacturer specs (e.g., 6x20 screws to ~10 Nm).
- Test-ride the vehicle or motorcycle, checking for proper damping, no leaks, and smooth steering. Resistance should be adjustable via the knob and sweep controls.
- Final Checks
- Inspect for oil leaks around the top cover, base valve, and bleed holes after a short ride.
- Verify the stabilizer provides consistent damping and doesn’t “let go” prematurely, which could indicate air in the system or worn internal components.
- Clean up any spilled oil and dispose of old oil properly.
Tips and Warnings
- Service Interval: Change the oil every 10-20 hours of heavy use (e.g., off-road riding) and replace seals every few oil changes to prevent leaks.
- Precision Required: Be cautious during disassembly, as internal components like the main wing or shear pin can be damaged. If unsure, send the unit to Scotts or an authorized service center like BRP ($75 basic service).
- Oil Type: Use only 3wt hydraulic oil (e.g., Bel-Ray HVI Light). Incorrect oil can degrade performance or damage seals.
- Ohlins/SD Compatibility: The Scotts rebuild kit is compatible with Ohlins/SD-style dampers, as they share the same design. Confirm part numbers for SD-specific components (e.g., top housing or sweep control).
- Cost Savings: A rebuild kit is significantly cheaper than a new stabilizer ($400+) or professional service (~$75+).
- Video Resources: Watch “Scotts Steering Stabilizer Detailed Service” or “Scotts Damper Quick Oil Change” on YouTube for visual guidance.
Troubleshooting
- No Damping: Likely due to air in the system or worn internal components (e.g., main wing or shear pin). Re-bleed thoroughly or inspect for damage.
- Leaks: Check O-ring seating, surface cleanliness, and bolt torque. Replace damaged main seals or top cover.
- Sticky Operation: Contaminated oil or damaged seals may cause this. Clean thoroughly and replace all O-rings.
Persistent Issues: If rebuilding doesn’t restore performance, send the unit to Scotts or BRP for inspection of internal parts like the shaft or housing.
Share